Custom Fivem Weapon Tutorial
GTA – Fivem Weapon List
September 11, 2023
How To Make A Custom Fivem Weapon
September 17, 2023GTAV – Editing Gun Models
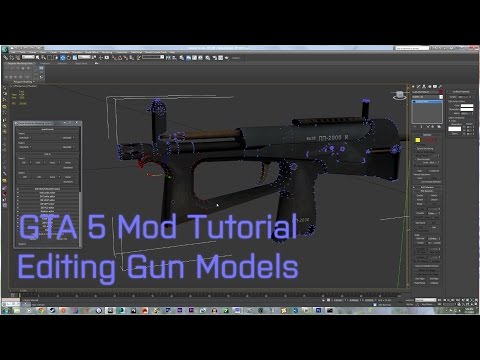
This tutorial will show you how to create custom weapons for GTA5.
Tools used in the tutorial:
- 3D Studio Max 2012 or later
- Adobe PhotoShop (CS6 Extended’s been used in the tutorial)
- FiveM
- FiveM Converter UI
- GIMS IV Max Scripts
- Kam’s Max Scripts
- OpenIV
- The so-called “ytdydryddyft2txddffcol“
The tutorial:
Before starting, I’d suggest to extract a copy of the shaders (from common.rpf) in FiveM/citizen folder.
- Install all the scripts, tools and programs listed above
- Extract FiveM, FiveM Converter UI and “ytdydryddyft2txddffcol” in the same folder (somewhere on your Desktop)
- In 3DS Max, import a model you would like to get into GTA5 (NOTE: Do not assign the model’s textures through the default Material Editor)
- Start OpenIV and go to: GTA5 directory/update/x64/dlcpacks/patchday3ng/dlc.rpf/x64/models/cdimages/weapons.rpf
- Extract a weapon (.ydr) model to ytdydryddyft2txddffcol’s converter folder
- Drag your weapon onto the ytdydryddyft2txddffcol.exe (a CMD screen shall appear) – this will convert the weapon to the .dff format which can be opened in 3DS Max (using Kam’s Scripts)
- In 3DS Max, open the “DFF IO”, check the “A” button (whose title is “Auto Skin after import dff character”) – Image
- Scale the custom model (the one you want to get into the game) and try to match the original one as close as possible
- Select the original model (the one taken from GTA5) and in the Vertex mode select all vertices, click on the Attach button and click on the custom model once and then press Del on your keyboard to delete the selection. The only thing that should be left here is the custom model. Image
- Start GIMS, open the Hierarchy Manager and set the IDE/WPL section to “anim”. Then copy the model’s name and paste it in the “File name” input under the “openFormats” section title. Then simply click on the Assign button below. – Image
- With your model still selected in the viewport, click on the “Convert Materials” button and then open the “Material Editor” by simply clicking on its button
- Once the material editor is opened, click on the material once. Total 2 new windows shall open. The left one is the “Collision Material” and the right one “Model Material” Image
- In the Model material window, change the “Shader” from Default to Bump and the “Parameter set” from Null to “gta_normal_spec”
- Browse and apply the necessary maps (diffuse, normal and specular maps) and set the “Specularly” and “Spec. map power” value to the one you want
- Under the “openFormats” tab (in GIMS), uncheck the “Split Smoothing groups” and export the model (NOTE: Export it to a new folder where you shall place the “gtaiv.exe” as well) – Image
- Open OpenIV and select GTA4, browse for gtaiv.exe and enable the “Edit Mode”
- Press Shift+Insert and add the weapon’s .wdr file
- Extract the .wdr into the FiveM Converter UI folder and open CMD (would be easier and better to create a copy of CMD in the FiveM Converter UI folder). To convert your .wdr file to the correct format, type the following:
fivem formats:convert FILENAME
Here’s an image of the CMD. Of course, you shall use the paths to your folders.
- Once done, you should have a .ydr file now which you are supposed to put in the game (use this tutorial to create a mods folder so you can easily install mods without having to verify the game’s files)
- While in OpenIV, open the weaponname.ytd and delete all the textures. Then import the new textures and save the .ytd
- Disable OpenIV’s Edit Mode and close OpenIV
- Play the game and test the newly created mod
